> ## Documentation Index
> Fetch the complete documentation index at: https://docs.gidr.ai/llms.txt
> Use this file to discover all available pages before exploring further.
# Files
> Upload and manage file-based data sources.
The **Files** data source allows you to upload documents directly to your GIDR for ingestion and processing.
## Connect Data source
1. Select **Data Sources** > **+ Add**.
2. Choose **Files** as the source type.
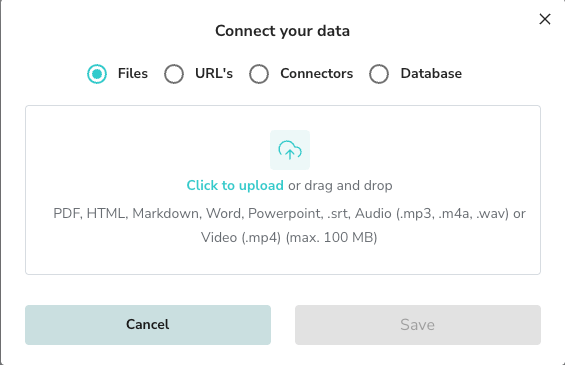 3. Drag and drop your files or click to upload. Supported formats include PDF, HTML, Markdown, Word, PowerPoint, Audio, and Video (max 100 MB).
 ## Managing Files
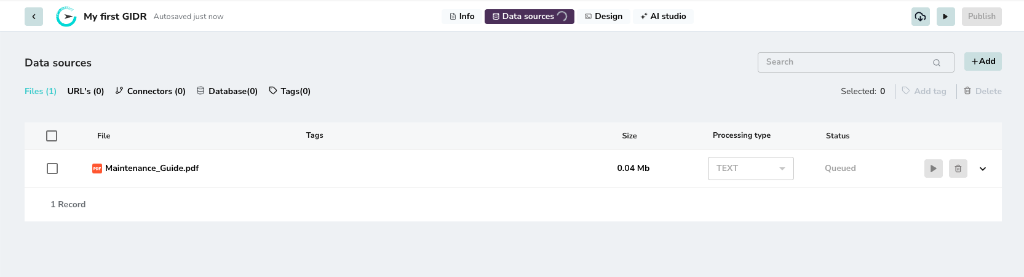
Once uploaded, your files will appear in the list view.
### Processing Status
Initially, files may appear as **Queued** or **Processing**.
## Managing Files
Once uploaded, your files will appear in the list view.
### Processing Status
Initially, files may appear as **Queued** or **Processing**.
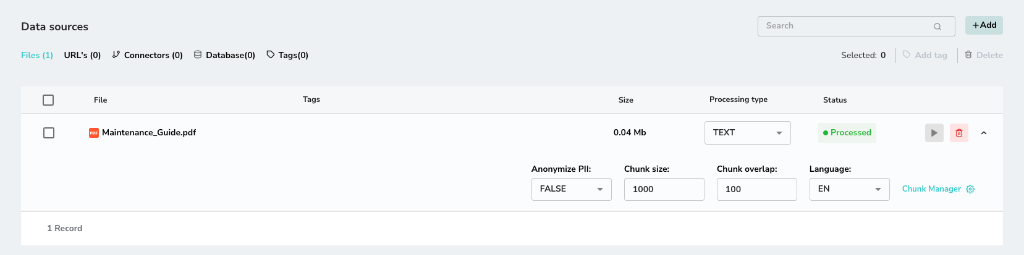 When ingestion is complete, the status changes to **Processed**.
 ### Reprocessing Files
You can modify ingestion parameters for any file and re-process it.
1. Change editable parameters such as **Processing type** (e.g., from **Text** to **Image**).
2. Adjust other settings like **Chunk size**, **Chunk overlap**, or **Language** as needed.
3. Click the **Play** button (triangle icon) to trigger re-ingestion with the new settings.
### Reprocessing Files
You can modify ingestion parameters for any file and re-process it.
1. Change editable parameters such as **Processing type** (e.g., from **Text** to **Image**).
2. Adjust other settings like **Chunk size**, **Chunk overlap**, or **Language** as needed.
3. Click the **Play** button (triangle icon) to trigger re-ingestion with the new settings.
 The available parameters and their effects are detailed in the [Ingestion Settings](../info/ingestion-settings) page.
## Chunk Manager
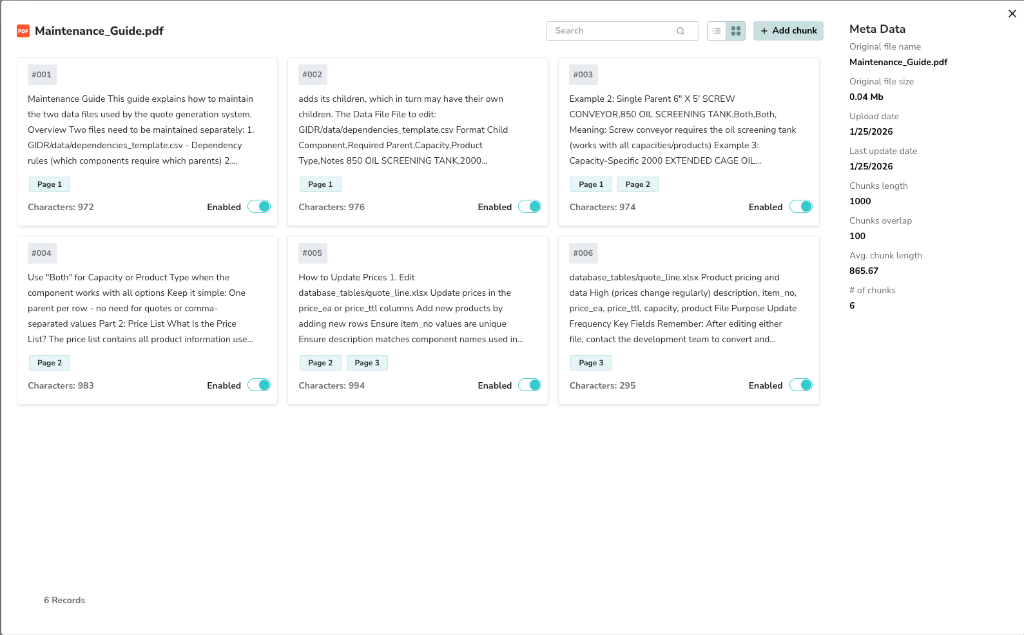
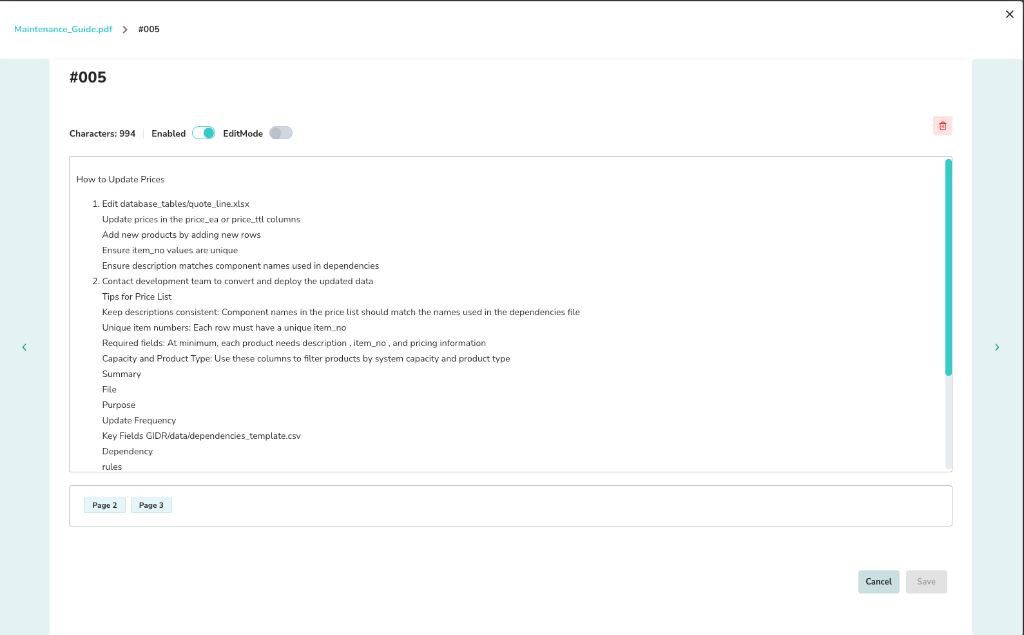
For processed files, you can view and edit the generated chunks to fine-tune retrieval accuracy.
1. Click the **Chunk Manager** link (or gear icon) next to a processed file.
2. Review individual chunks, their enabled status, and metadata.
The available parameters and their effects are detailed in the [Ingestion Settings](../info/ingestion-settings) page.
## Chunk Manager
For processed files, you can view and edit the generated chunks to fine-tune retrieval accuracy.
1. Click the **Chunk Manager** link (or gear icon) next to a processed file.
2. Review individual chunks, their enabled status, and metadata.
 ### Editing Chunks
You can toggle a chunk's **Enabled** status to include or exclude it from retrieval. You can also view metadata such as character count and source file details.
### Image Processing View
When a file is processed using the **Image** processing type, the system uses a vision model to analyze the layout and content.
### Editing Chunks
You can toggle a chunk's **Enabled** status to include or exclude it from retrieval. You can also view metadata such as character count and source file details.
### Image Processing View
When a file is processed using the **Image** processing type, the system uses a vision model to analyze the layout and content.
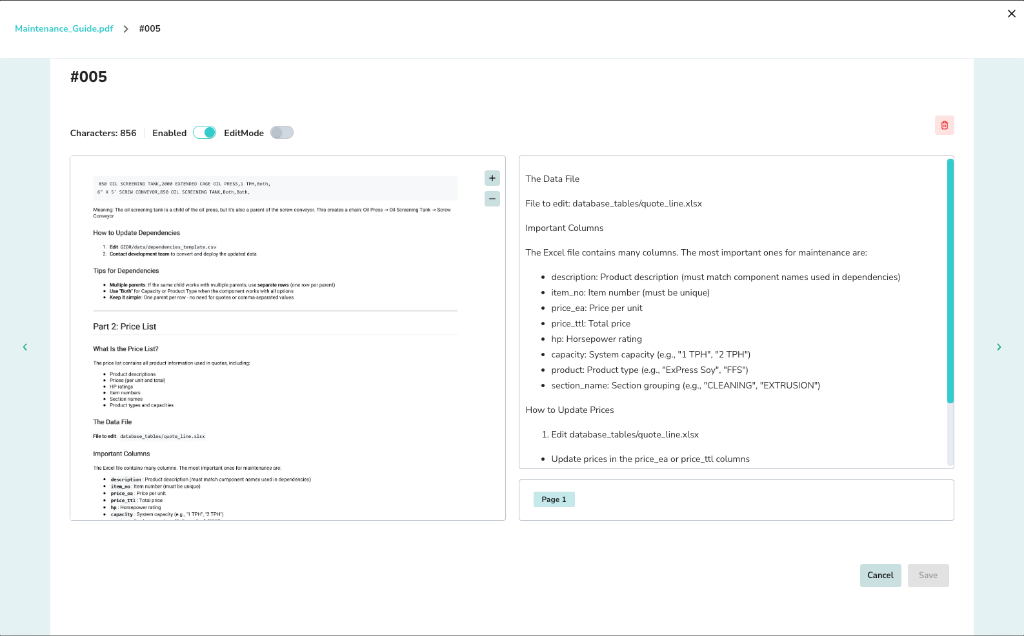 The Chunk Manager displays a **side-by-side view**:
* **Left panel**: Shows the original page image.
* **Right panel**: Displays the generated description and extracted data.
This allows you to verify the AI's interpretation of visual elements (charts, diagrams) against the source document while editing the chunks.
The Chunk Manager displays a **side-by-side view**:
* **Left panel**: Shows the original page image.
* **Right panel**: Displays the generated description and extracted data.
This allows you to verify the AI's interpretation of visual elements (charts, diagrams) against the source document while editing the chunks.